
Use Rapyd Checkout to create a cross-border hosted checkout page.
Customers abandon shopping carts at an alarmingly high rate due to hidden costs, extra steps, and unavailable payment methods. On average, 77.73% of all online shoppers worldwide abandon their carts.
Developers can minimize these factors by creating a quality customer experience that is localized, reduces cognitive load on users and offers the right payment methods. Rapyd Checkout provides a hosted checkout page so you can focus more on your business operations and reduce the time and effort needed for cross-border payment acceptance.
The following steps will lead you to create a hosted checkout page using a local Visa debit card example (e.g mx_visa_card) and include some of the required fields for the payment method.
Step 1: Sign up in Client Portal
Go to your Client Portal account and grab your rapyd_access_key and rapyd_secret_key within the Developers tab.
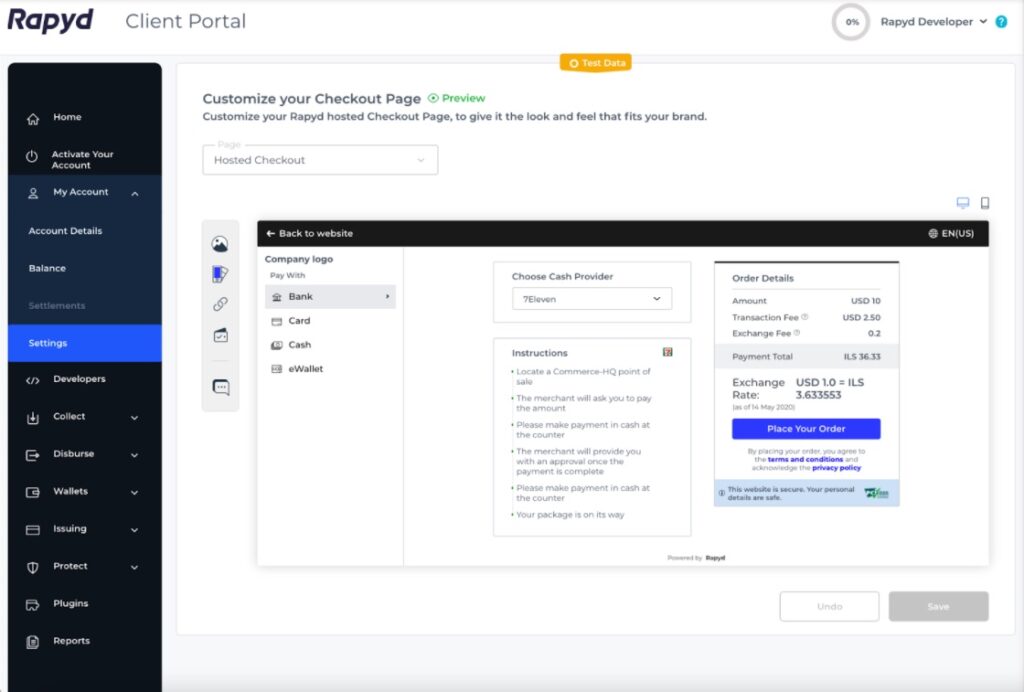
Step 2: Customize Your Hosted Page
You can customize the hosted page you will be creating in client portal. Go to My Account > Settings > Branding to add your logo, edit the colors, fallback url, default listed payment methods, and support links.
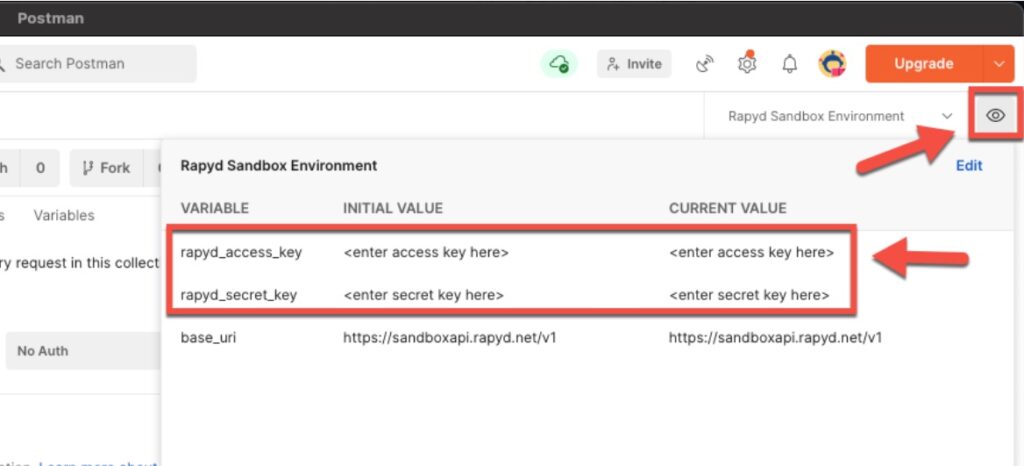
Step 3: Setup Your Postman Environment
Download our Postman Collection and input your rapyd_access_key and rapyd_secret_key in the Postman environment titles Rapyd Sandbox Environment as shown below.
Step 4: List Payment Method and Get Required FIelds.
Find your payment method you will accept in your desired country with the List Payment Methods By Country API. Use the Get Payment Method Required Fields to collect the required fields for your next steps. For example, using mx_visa_card will require a number, expiration_month, expiration_year, and cvv.
Step 5: Create a Wallet
Use the Create Wallet API to step up a wallet contact to create a customer for your hosted checkout page request. Your wallet ID given in the API response will begin with ewallet_.
Step 6: Create Customer with Payment Method
Use the Create Customer API and include the payment method type, required fields from step 4 (e.g. mx_visa_card) and the Rapyd wallet ID starting with ewallet_ from step 4 in the request body. Your customer ID in the response body will begin with cus_. This will be required for creating a page with specific customer information, however you can create a guest page without any saved customer details.
Step 7: Checkout Page for Customer
Use Create Checkout Page API and include your country code (e.g. MX), currency (e.g. MXN), customer ID, and payment_method. You can also include the complete_payment_url and error_payment_url to direct the user to a specific url page after the payment. Checkout the request and response below as an example of the checkout page.
Create Checkout Request Request Body

- Note: A guest page will not include the customer ID starting with cus_.
Create Checkout Response Body

The redirect_url will link to the hosted checkout page.
- Note: the previous response does not reflect the full response body.
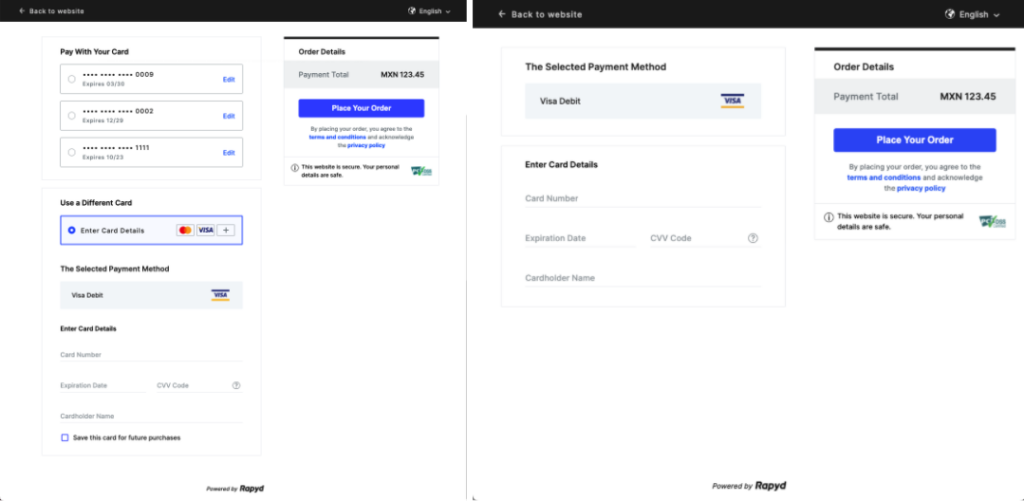
Congratulations! You have successfully created a Hosted Checkout Page for your customer!
You can click on the redirect_url to see the page. The payment method you entered for your customer should be on the page. However, the user can also use a different card and add new details.
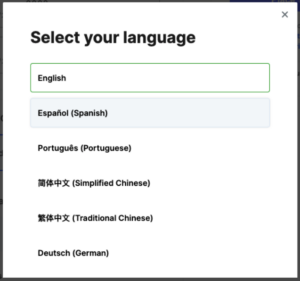
Change your language
You can change the language of your page by clicking the language dropdown at the top right, and a language diablox box will appear.
For more details on the Hosted Checkout Page refer to the Rapyd Checkout Overview page.
Start a conversation about your checkout page on our Rapyd Community page.


Subscribe Via Email
Thank You!
You’ve Been Subscribed.